Issue
In many situations, customers need to integrate more than one LNS database into a single Vista database.
Product Line
TAC Vista
Environment
- Vista
- LNS
- LonMaker
- NL220
- TAC Vista System Plug-In
Cause
- This is very common in retrofit situations where a new LonMaker or NL220 database is created for the new section of the building. Still, the existing system was programmed in a completely separate LonMaker or NL220 database.
- This is common for multi-building systems like school districts that expand and add schools or buildings over time and integrate into one Vista database.
Resolution
Some general rules must be followed when integrating multiple LNS databases into one Vista database.
These rules are:
- You can not integrate more than 4 LNS networks to 1 Vista database when doing straight LNS server-to-Vista server communication.
NOTE: If more than four networks are needed, the system must utilize the Loytec NIC852 key and the Orion stack.- When using the Orion stack and 1 Loytec NIC852 key will expand Vista's capability to 8 LNS networks simultaneously.
- If more than 8 LNS databases are needed, then multiple Loytec NIC852 keys are needed.
- Vista can only communicate to 4 Loytec NIC852 keys simultaneously for a maximum of 32 LNS databases per Vista server.
- It is recommended never to use more than seven ports on the NIC852 for serviceability reasons, with Lonmaker or NL220 truly giving the system a 28-network limitation.
- The Menta file paths from the site or engineering PC will be stored within the path structure of the System Plug-In. If these files are not in the exact same path on the Vista server that the LNS database is being integrated to, all.MTA files will have to be browsed for every controller. It is recommended to save all Menta files from the engineering Vista database to a folder on the machine to ensure they are the most current files. Then copy that menta files directory to the new Vista server to ensure the System Plug-In will search and copy the same path when transferring the network to the vista database.
- Every LNS database integrated into the Vista server must have a unique domain ID. See the instructions and screenshots below.
The screenshots and instructions below detail how to build one Vista database with two LonMaker databases. The first database will be called NETWORK1, and the second database will be called NETWORK2.
Please follow these instructions:
- Restore and open the LonMaker database NETWORK1 on the machine running the Vista server database into which the LNS system will be integrated. The Vista server must be running and logged in to continue with the next instruction.
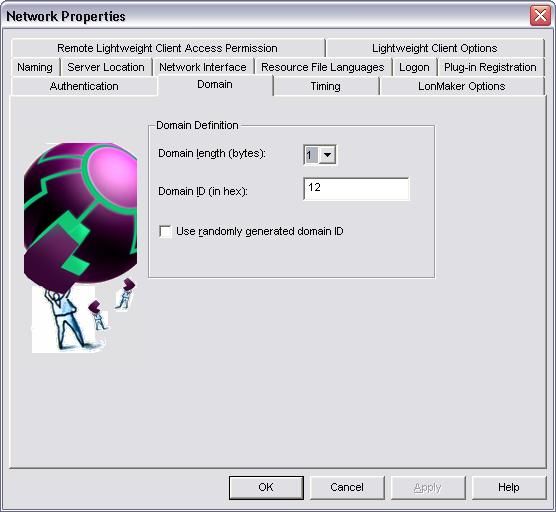
- From the Visio menu bar, choose LonMaker and Network Properties. Set the Domain ID to a unique number within the Vista database. Systems sharing the same LNS server communicating to one Vista server must have unique Domain ID numbers.
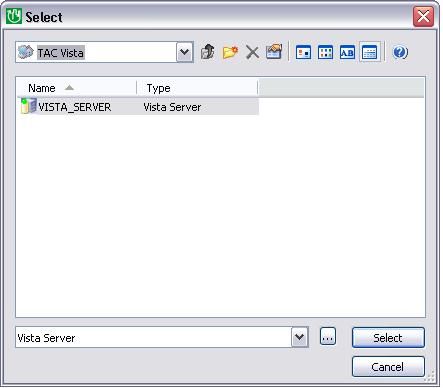
- In the NETWORK1 LonMaker database, open the TAC Vista System Plug-In and choose the toolbar menu item TAC Network, then choose settings. Click the browse button next to the Operator unit object: and browse to the local Vista server object running on the machine. The Operator unit object: entry to change to the Vista server object name currently running on the local machine.
- In the TAC Network Settings menu, the Vista communication port should be set to Communication Port - LNS, and the Vista communication port name should be unique to the LNS network name. LNS_Network Name is good practice. In the example below, it is LNS_NETWORK1. Click Apply, then OK, and close to close the TAC Network Settings window.
- In the TAC Vista System Plug-In, click the Update TAC Network Icon.
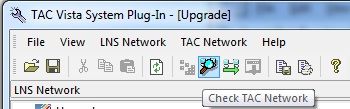
- Next, click the Check TAC Network Icon. Check for any errors or warnings in the output pane.
- Then finally, click the Update Vista Database icon. This process will copy all of the Xenta groups, Lonworks groups, .MTA files, and .XIF files to the Vista database.
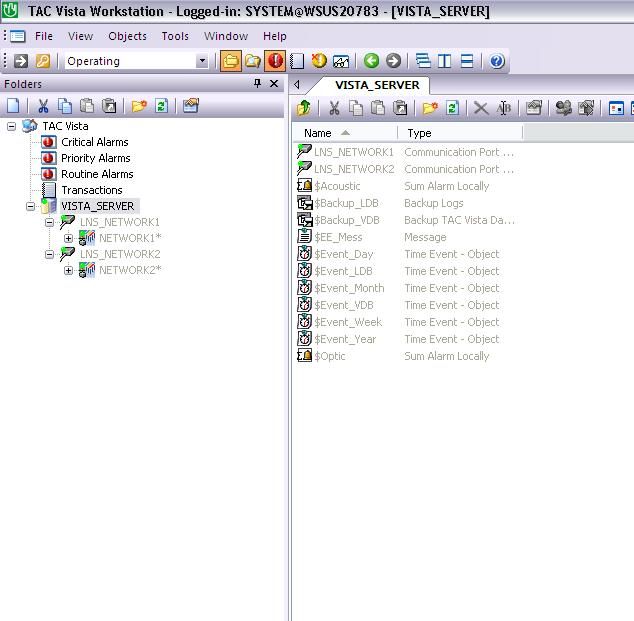
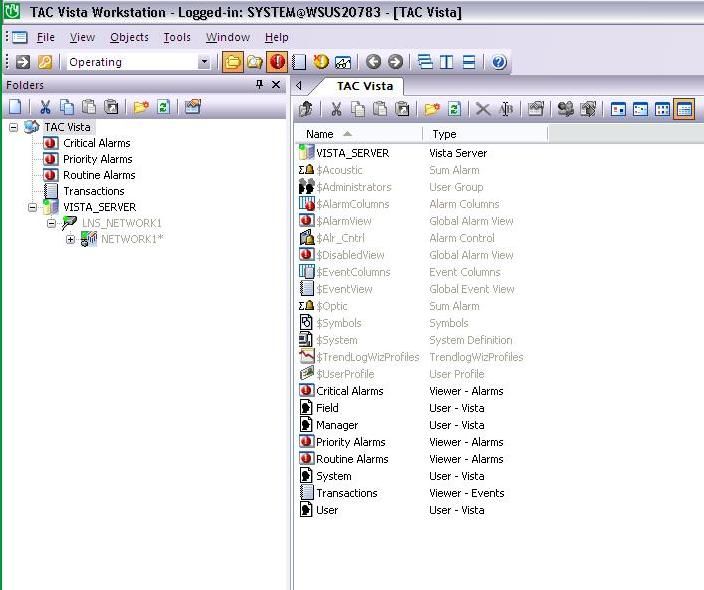
- Once the Vista database has successfully updated, open Vista Workstation, and the LNS port should be created along with the physical LNS network. In the screenshot below LNS_NETWORK1 is the LNS port, and NETWORK1 is the physical LNS database.


The steps to add the second LNS database are almost identical except for steps 2 and 4 above. Follow these instructions to integrate NETWORK2 into the Vista database.
- Restore and open the LonMaker database NETWORK2 on the machine running the Vista server database into which the LNS database will be integrated. The Vista server must be running and logged in to continue with the next instruction.
- From the Visio menu bar, choose LonMaker and Network Properties and set the Domain ID to a unique number within the Vista database. Systems sharing the same LNS server communicating to one Vista server must have unique Domain ID numbers.
- In the NETWORK2 LonMaker database, open the TAC Vista System Plug-In and choose the toolbar menu item TAC Network, then choose settings. Click the browse button next to the Operator unit object: and browse to the local Vista server object running on the machine. The Operator unit object: entry to change to the Vista server object name currently running on the local machine.
- In the TAC Network Settings menu, the Vista communication port should be set to Communication Port - LNS, and the Vista communication port name should be unique to the LNS network name. In the example below, it is LNS_NETWORK2. LNS_Network Name is good practice. Click Apply, then OK, and close to close the TAC Network Settings window.
- In the TAC Vista System Plug-In, click the Update TAC Network Icon.
- Next, click the Check TAC Network Icon. Check for any errors or warnings in the output pane.
- Then finally, click the Update Vista Database icon. This process will copy all of the Xenta groups, Lonworks groups, .MTA files, and .XIF files to the Vista database.
- Once the Vista database has successfully updated, open Vista Workstation, and the LNS port should be created along with the physical LNS network. In the screenshot below LNS_NETWORK2 is the LNS port, and NETWORK2 is the physical LNS database.
As network 2 does not use the default Domain length of 1 and Id of 11 and uses a Domain length of 1 ID 12, any operator panel used in this system will need this domain setup to work this network. You can adjust the OP Domain setting as described in the following article, "No Answer" on an OP when connecting to a Xenta 280/300/400