Ask our Experts
Didn't find what you are looking for? Ask our experts!
Share Your Feedback – Help Us Improve Search on Community! Please take a few minutes to participate in our Search Feedback Survey. Your insights will help us deliver the results you need faster and more accurately. Click here to take the survey
Schneider Electric support forum about installation and configuration for DCIM including EcoStruxure IT Expert, IT Advisor, Data Center Expert, and NetBotz
Search in
Link copied. Please paste this link to share this article on your social media post.
Posted: 2020-07-03 05:39 AM . Last Modified: 2024-04-08 11:16 PM
Video Tutorial: http://www.apc.com/us/en/faqs/FA299440/
1) Create a folder on the Windows System that you would like to be the backup destination.
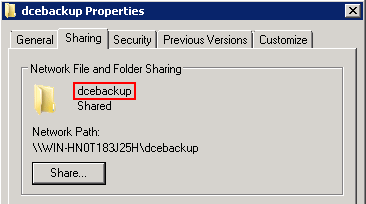
2) Right click on the folder and select properties. Select the "Sharing" tab and then Select "Share..."
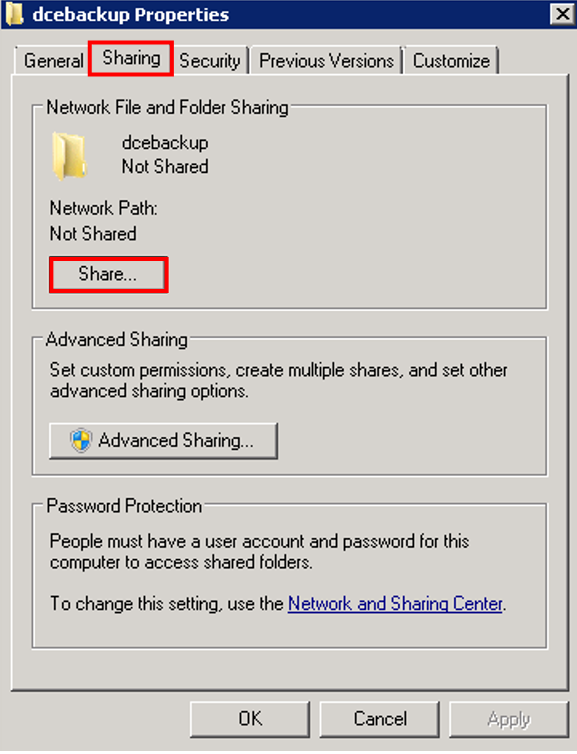
3) Ensure to add the specific user that you would like StruxureWare Data Center Expert to use to connect for storing the backup. Set that users permission level to be Read/Write.

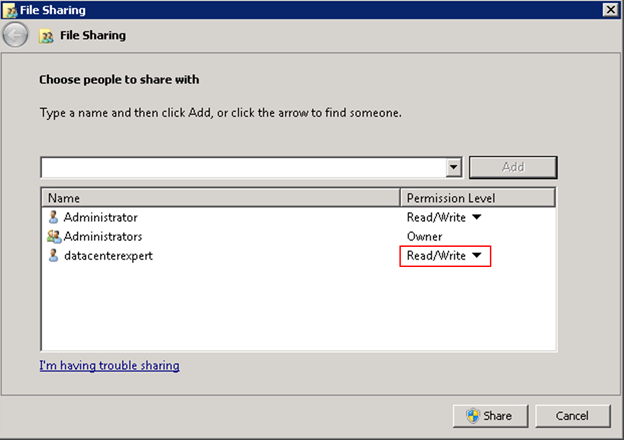
4) Select Share and then Done.
5) Select Advanced Sharing and then permissions. Ensure to add the specific user that you would like StruxureWare Data Center Expert to use to connect for storing the backup (same user used in step 3). Set that users permission level to be Full Control.
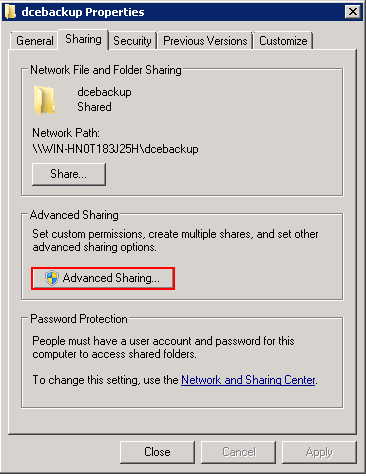
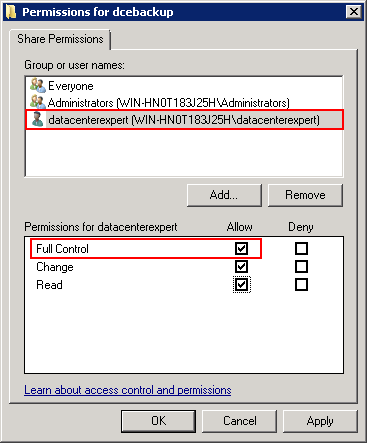
6) Select: Apply, Okay, Apply, Okay. Record the Name of the share as that is one of the components needed to specify the backup location. You will also need the IP address, or hostname if you have DNS configured on the Data Center Expert Server, of the Windows machine that you have created the windows share on.
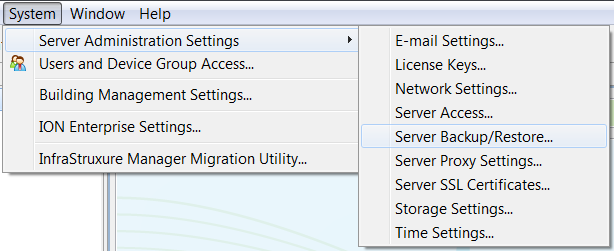
7) Log into the StruxureWare Data Center Expert Client. Open the System > Server Administration Setting > Backup/Restore.
😎 Select: Add Backup > Windows Share > Next.
9) Fill in the required information:
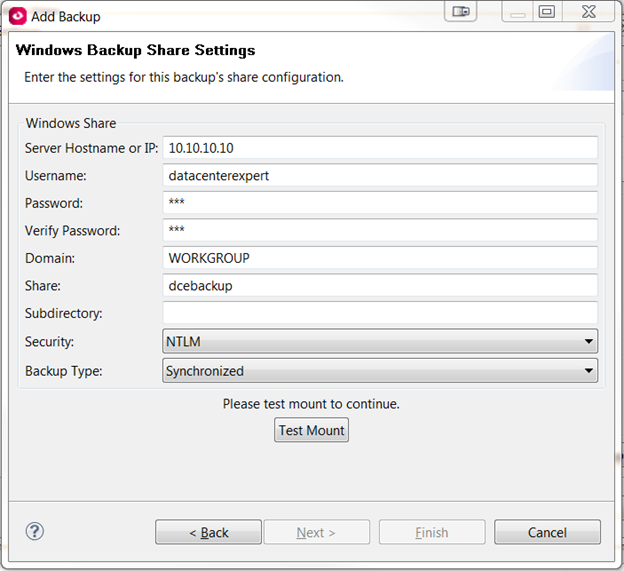
10) Select Test Mount, if successful, it will inform you that the share was mounted successfully. The Next button will highlight and you can schedule the backup to run on a regular basis, if you would like. Select Finish.
11) The backup displays in the table at the top of the Server/Backup restore screen. You can click on it to select it and then select “Start Backup” at the bottom. Progress while the backup is running can be seen within the Backup Progress section. You do not need to remain on this screen while the backup is running. In the Backup Details section you can see if the last backup succeeded or failed.
Troubleshooting:
If the share fails to “Test Mount” ensure that you have set all of the required permissions and are using the correct information within the “Windows Backup Share Settings.” If it is still an issue, please check with your network administrator to ensure that NTMLv1 is allowed, if you are running Data Center Expert v7.2.7 or lower. FA228540
(CID:108235332)
Link copied. Please paste this link to share this article on your social media post.
Link copied. Please paste this link to share this article on your social media post.
Posted: 2020-07-03 05:39 AM . Last Modified: 2023-10-31 10:23 PM

This question is closed for comments. You're welcome to start a new topic if you have further comments on this issue.
Link copied. Please paste this link to share this article on your social media post.
You’ve reached the end of your document
Create your free account or log in to subscribe to the board - and gain access to more than 10,000+ support articles along with insights from experts and peers.